This module involved learning a lot of new techniques and processes. I knew from the beginning that I wanted to concentrate the most on animation so I organised my time accordingly and made sure that my model and rig were to the best standard I could get it. Without a model with good edge flow/topology and a decent rig the animation wouldn't be up to scratch. I knew I was being quite ambitious with this project by wanting to create a quadruped but I wanted to push my skills further and try something new. I came across a few issues during this module, the main one being the way I rigged my characters front legs weren't correct so this hindered my animation. I wasn't able to move it fully and had to do the best I could without making it too noticeable.
I'm really pleased with how the animation has turned out, I can see how much I have improved since when I first started last year. I will take what I've learnt in this module about animation workflow and will be using this in my future animations. Considering it was my first major time using After Effects I think it's turned out alright, I may explore it further in my own time but animation is still my main focus.
Invasion! from Siobhan Parkhouse on Vimeo.
Showing posts with label OUDF504. Show all posts
Showing posts with label OUDF504. Show all posts
Thursday, March 7, 2013
Invasion Title Sequence
For my title at the start of my film, I wanted something that would suggest the theme of the film itself. Originally my character was going to have fur on it but due to time constraints I wasn't able to achieve this, although the spaceships are all furballs. For awhile I had the idea of wanting furry text but wasn't sure how to go about it, in the end I found a tutorial about using hair within Cinema 4D. This programme was completely new to me but after a couple of tutorials I had the basics to do what I needed. It's another 3D package so the tools are similar and once you know one software, skills are transferable. Because I didn't have enough time to fully explore the hair system within Cinema 4D I just took the basics and created some text. It's similar to Maya in the fact that you add hair onto your desired geometry, where it's more simple, is that Cinema 4D doesn't require any complex mapping to have the hair cover shapes that aren't just primitives.
To begin with I wanted the text to come down from a height and thought it would be quite a nice effect as the hair has a gravity influence on it, so would react to the movement of the text. The problem was that the hair reacted too much and there were too many strands that were flying about, instead it gave more of the feeling of static and electricity than furry. See here.
The next version I tried was to reduce the movements and have the text go side to side. See here. This was much better however it felt a bit odd for it just to be moving like that. I knew for my credits I was going to have the words fade out with a particle transition so I thought I would try this with the hair. I quite like the effect as it allows for the hair to rest before it gets swept away. The only thing I would try and change if I had time, would be to see if there was a way around not having the hair return to it's original state before the particles kicked in as to me it's quite noticeable. But overall I don't think it's too bad of an attempt for my first go at Cinema 4D and some of the effects you can produce within it.
Breakdowns
Below are two breakdowns of one of the shots I created for my film. The first one is the compositing breakdown, it shows the process I went through to create the final comp including keying out green screen, adjustment layers and adding in extra effects. The second one is a visual effects breakdown showing the different effects I used to created the abduction scene. By creating these it shows my work in progress and the steps I took to create the final piece. It's good to include breakdowns like these, especially if you're wanting to get into the VFX industry.
Wednesday, March 6, 2013
Within a Minute: The Making of Episode III
Near the beginning of this module we watched 'Within a Minute: The Making of Episode III' which took you through the whole process of how ILM went about creating just one minute of footage in Star Wars Episode III. Scene 158 consisted of 26 shots, 1185 frames, around 910 artists and about 70441 hours. Throughout the whole time watching this documentary it really opens your eyes to how much time and effort goes into creating a shot like this. There were so many different departments involved and you tend to overlook a lot of them. When you think of a VFX shot you think, compositors, modellers, animators, VFX artists etc; yet in actual fact the sets and props need building, always a huge amount of equipment for filming needs setting up amongst other things. For part of the scene they actually built a set and used this to create physical effects. For the lava in particular, they found that by creating the effect physically produced more of a realistic feel and look. It proves that not everything needs to be digitally recreated, sometimes it's better without technology. With the footage they got from their lava, they composited this within the rest of the digital scene.
In this documentary they showed their use of pre-viz. Pre-viz is a huge thing within the industry now, it helps everyone visualise what is going to happen throughout the film. Previously it was all storyboarded, but now there are dedicated people who work within the pre-viz department who create 3d assets and plan out the shots and actions of the characters in a 3d space. With this you get a better idea of the spacing of the scene and how much area you have to work with. I can see this being really useful for animators especially as it gives them more of a solid grounding with where about the characters are moving. After doing this module you can really see why there needs to be so many people on the team and can appreciate how much time and effort actually goes into just one minute of footage.
In this documentary they showed their use of pre-viz. Pre-viz is a huge thing within the industry now, it helps everyone visualise what is going to happen throughout the film. Previously it was all storyboarded, but now there are dedicated people who work within the pre-viz department who create 3d assets and plan out the shots and actions of the characters in a 3d space. With this you get a better idea of the spacing of the scene and how much area you have to work with. I can see this being really useful for animators especially as it gives them more of a solid grounding with where about the characters are moving. After doing this module you can really see why there needs to be so many people on the team and can appreciate how much time and effort actually goes into just one minute of footage.
Tuesday, March 5, 2013
Prometheus
Ferran Domenech, animation supervisor from The Moving Picture Company did a talk at Animex about how they went creating the visual effects and animation for Prometheus. A key thing that was brought up was to always test the rigs before you go ahead with the animation, every control needs to be tested as you need to be sure everything is in working order before proceeding. Going ahead with a faulty rig would end up wasting time, effort and money as it would have to be fixed and the animation re-done. In order for the animation to line up they matchmoved it allowing the animation to be in the correct position in correlation to live action footage and 3d models. We never got to use this technique so it was interesting to see the different breakdowns they took to achieve the final result. Along with matchmoving the footage, they also made sure the alien pressed up against the glass of the helmet in one shot. This would add to the believability and realism of the shot and make the viewer visually see the alien inside the helmet. All the small details count, so adding smears on the glass from the slime will add to the overall final appearance.
The environment composed of different layers being composited together, the ground plate actually came from Iceland yet the cliffs came from another country. These were all shot on location with the actors and then the cg models/animation along with the visual effects were put in afterwards. For a film like this the viewer knows it's not real, however they still need to be immersed within the film and while they are watching it they should feel part of it. To sustain this immersion a big part of this is to make sure all the cg components are seamlessly integrated with the live action footage. Neither should look out of place, both should look and feel like they come from the same thing.
MPC Prometheus VFX breakdown! from MPC on Vimeo.
Organising Time
Organisation was a big part of this project, not only was there a lot of accomplish as a whole but for myself, I was going to be taking a week off to attend Animex at Teesside University. I had to plan out what I was going to be doing and how long it would take me, this kept me on track and made sure I had enough time to complete everything to a high enough standard. It's always useful to plan out your time accordingly as it gives you a time scale to work from and you have to be realistic with the tasks you set yourself. I stuck to my schedule pretty well, though there were some parts where I didn't do till later and started some earlier, but in the end everything was done on time, and my main goal really was to have the animation at least 80% completed before I went off to Animex. After that I would only really have about a week left and that was mainly for finishing pieces off before the final crit. I wanted to have a near completed film to show at the final crit to get as much feedback as possible and it would also leave the last week for tying up loose ends and altering small aspects.


Render Layers
A couple of weeks ago we were introduced to render layers and how they would be used. Render layers allow for more control in post production, as there are normally many different pieces brought together in vfx it's good to have this control as things may not match up perfectly with one another and will require adjustments. They work in a similar way to how the layers do in maya, by putting different objects on different layers it allows you to render out those specific items. When it comes to render layers, you typically would render out a colour pass, shadow pass, reflection pass and an ambient occlusion pass. On each new render layer you create you can apply overrides onto them which will just affect that specific layer. One of the main uses for overrides is the naming system, another one would be for an object to receive shadows but not emit any.
For my scenes I will only be doing an ambient occlusion pass as this will help the rendered shots sit better in the scene. Ambient occlusion is self shadowing and just gives it that extra bit of depth and realism. I thought of maybe doing the other passes but I didn't think it would be that necessary, any adjustments to colour I could easily do within After Effects itself, the reflections are all set up to how it should be within Maya anyway and as for shadows there aren't that many due to the floor being black. For a scene that was more realistic I can see how these passes would be really beneficial, it all adds to that realism and helps the overall composition. As you can see below this is one of my frames as an ambient occlusion, it gets rendered out with an alpha channel so that the background will be transparent (this is just a screenshot so the transparency is replaced with grey). You can see the shadows on certain parts of the alien and the tree and once put together with the final comp, it really helps the alien shot sit better within the scene.

For my scenes I will only be doing an ambient occlusion pass as this will help the rendered shots sit better in the scene. Ambient occlusion is self shadowing and just gives it that extra bit of depth and realism. I thought of maybe doing the other passes but I didn't think it would be that necessary, any adjustments to colour I could easily do within After Effects itself, the reflections are all set up to how it should be within Maya anyway and as for shadows there aren't that many due to the floor being black. For a scene that was more realistic I can see how these passes would be really beneficial, it all adds to that realism and helps the overall composition. As you can see below this is one of my frames as an ambient occlusion, it gets rendered out with an alpha channel so that the background will be transparent (this is just a screenshot so the transparency is replaced with grey). You can see the shadows on certain parts of the alien and the tree and once put together with the final comp, it really helps the alien shot sit better within the scene.

Sound Design
Along with the film score I gathered together a range of sound effects which I then brought together within Final Cut to time it against my footage. By adding other sound effects it really gives the film more depth and will add to the realism. I spent awhile trying to find sounds that would fit my style and mood of my film and in some areas I found it quite hard but I managed with what I had. All the sounds I obtained are royalty free and mostly from Soundtrack Pro. Compared to my previous works this film has a lot more sound design than others and after doing this I can really see the benefits of it. Each object should really have a sound that goes with it, even if it's very subtle. The viewer can pick up on sounds not being there and it can break the emersion on screen. I made sure that my film score was the main bulk of my sound, and all the other sound effects were lowered down in comparison to it. Music really drives the performance and helps the film along so it's one of the key features that can't be rushed.


Sunday, March 3, 2013
Maya Set Extenstions
Because my alien character was created in Maya I also created an environment for it to exist in, this would be my virtual set extension where I would place my green screen footage of Jeff into it in post. As you can see the environment itself is very simple, however once rendered out it looks a lot better and if there was too many objects within the scene it would have felt too cluttered as I wanted to create a clean cut look. As I have mentioned in a previous post, the background would just be a texture dropped behind the footage in After Effects. The image below shows a plane for the background but this is just for the lights to bounce off of and produce reflections.
When going into post with a virtual set and character you have to make sure both the models and the real footage work together as a whole. They both have to look like they have come from the same thing for it to be believable. In order to achieve this as best as possible some colour grading needs to be applied, tint is a good one to use as you take the blacks and whites from the scene and can adjust your footage to it accordingly. I did this to all my shots and I also turned down the lightness of my alien character as I found that it was a bit too bright when put in the shot with Jeff.
I also had to do some other adjustments, especially with the ambient occlusion layer as this tends to leave a harsh outline around the objects. To get rid of this and to create more of a seamless integration, I used a simple matte choker to take away that harsh edge by a few pixels. By doing this it already makes the character sit far better within the scene. With virtual set extensions you also have to make sure the lighting matches how you set up the lights when filming green screen. Ideally you would set up the lights when filming to match your virtual scene, by doing this it makes life a lot easier. Trying to put in a light in post would be a lot harder than doing it all correctly in the beginning.

Animating the end shot
 For my last shot my plan was to have my alien character jump onto Jeff, our actress. When it came to creating this animation I realised I would have to find a way of having that section of film footage where Jeff falls over and putting that into Maya. I needed to do this as I couldn't just animate it without having the footage as reference, if I didn't have it the animation wouldn't line up when it came to compositing the two elements together. In order to do this I had to take my video footage and export this out as an image sequence. It's much easier to work with image sequences in Maya than it is video. With this image sequence I then attached this onto an image plane as a shader, I could then adjust the image number attribute (as seen on the left) to delay the start of the image sequence so that my animation would work with it. By doing this I could make sure everything lines up with one another and the timings of both the animation and video are synced with one another. All I would then have to do is line up both together within After Effects.
The screenshot below shows the setup I used within Maya. I made sure that I had my rendercam setup and locked off on the right and my perspective / workcam on the right. This allowed me to move around in the world space but also see the effects within the camera view. Because of the way Jeff falls it was hard to animate the movement of my alien, it couldn't achieve and nice full arc. This wasn't Jeff's fault as we couldn't really have someone running and pushing her over at force because she might hurt herself and the crash mat we had wasn't anything substantial, instead she fell over in a way that she felt comfortable with and even so it's a good enough performance. The arc may not be there but I made sure the rest of the animation was up to scratch.
It was suggested that maybe I move the alien back, towards the right to give it more space to jump, however the previous shot shows the alien jumping up close to the camera so by having the alien further away from Jeff it wouldn't make much sense and there would be a delay in the time it takes for the impact. It's not perfect but I still think it fine, you have to adapt and work with what you are given with and I feel like I've done my best with it. In post I will go in and mask out one of Jeff's legs in order to bring it infront of the alien and also add in a shadow for when the alien jumps onto her. This will make the character sit better into the scene, rather than just looking like a 2D image.

Invasion Film Score
I met John Waugh at an All Animated networking event in Leeds and we decided to do a collaboration on my next project. By working with someone outside of my course and college it was a new process to me so I learnt many things by doing this. It also made me stick to my schedule more as I had more concrete dates to stick to in order to hand over work to John so he could begin with the score. To begin with I gave him a rough idea of what my short would entail to see if he was up for producing the score, from there I went on to creating storyboards and rough edits, all the while updating John with these and getting feedback and ideas off one another.
Sound design and music scores really help move anything along, so I was really happy with what John was coming up with. Music one of those things where it can change how something is viewed, so communication was key when trying to explain my ideas across. Honestly though, I left a lot of creative freedom with John as I had looked into his previous works and was impressed with what I had heard. He obviously knew a lot more than I did about music so I trusted his judgement but gave him a rough outline for what I was looking for by sending over examples from other films. After going back and forth with edits and test animations, we decided that it would be best that John didn't finalise anything yet until I was able to send him a final edit with the timings locked down. This ensured that his score would fit my film perfectly and also wouldn't be wasting time on sections that may or may not be in the final thing.
I really owe a lot of John as not only has he given me a great score for my film, but also by working with someone off my course it has helped me to understand the process better and work more professionally. John's work can be found here: https://soundcloud.com/jwaugh
Wednesday, February 27, 2013
Animating a Quadruped
I realised I was being quite ambitious, wanting to animate a quadruped when I have only worked with a biped a couple of times. My rig that I created for my alien character wasn't as accurate as I would have hoped, I ended up rigging the front legs wrong so that it bent the wrong way. When it came to animating I just had to work around this and do the best I could with what I had. I looked at a lot of reference videos to get a better understanding of how quadrupeds walked, especially cats in particular. I then took one video and broke it down into the main poses, contact, down, passing, up, contact. By doing this I had a clear image of each pose and could then work from these to block out my animation.
As my alien was jumping down from a tree I found a really useful video that I ended up referencing a lot. It was really helpful that it was in slow motion as well as I could take my time going through the video and analyse each shot and see how the body reacts through the air and on impact. There's a lot more to take into consideration when animating a quadruped, the legs have to work with each other yet they are offset at different points.
I also decided to follow a proper workflow this time, in the previous module I had tried to block out my animation first and then change this to spline, however I had a lot of issues with it and ended up just working straight from auto-tangent. This time I wanted to try again and I actually succeeded, by blocking out just the key poses first and not worrying about timings it makes things a lot easier. You are able to just concentrate on building good poses and putting in key ones to build your foundation. From here I then went in between and put breakdowns, the computer needs as much information as possible, without the necessary information it will just guess. Which is the issue I had before, I wasn't detaield enough with my blocking. The more time you spend in blocking, the easier it is when it comes to clean up. Below is the final stage of the tree jump animation, I'm really happy with this as I feel like I have a better understanding of the whole process and can progress this further next time. Blocking, adding in breakdowns and then going into spline is a far easier and cleaner workflow than what I was previously doing.
Tuesday, February 26, 2013
Location / Green Screen Shoots
A major part of this project was to film the footage we needed for our shorts. As we were all given the same first 4 shots, we filmed this outside college as a group under the guidance of Annabeth and Mat. Some people took specific roles whilst others were extras within the film, for myself I undertook the role of Assistant Director. It was my job to get everyone into position before each shot and tell the camera assistants when to start rolling. When the camera was up to speed, by calling out 'mark it' this is when the clapper board comes in to detail what shot it is and what take.
There were a few things we had to take into consideration when filming out in public, the main one was trying to deter people from walking across the area we were filming. We used barriers and tried to film when it was the most quiet, i.e before everyone went on lunch. Because we used extras in our shoot it wasn't the end of the world if a member of the public walk on shot as they would hopefully just blend into the background.
There was only one major shot where we had to use a green screen for, and this was for the abduction scene. We first filmed the actor in front of the green screen and then with the camera in exactly the same position, filmed a back plate shot. The camera needed to be in the same position as otherwise the green screen footage would not marry up to the back plate.
The second shoot involved filming indoors as this was mainly green screen. This time we had to pay attention to the lighting, we wanted to have as little shadow as possible casting onto the green screen, this would make keying out easier. Also the more you can do on film the better, so by setting up the lights to how we would have them in Maya was important. It's all about the continuity and the seamless integration.
It was also important to have our storyboards completed when it came to filming as this not only helped communicate our ideas better with our actress, Jeff but also sped up the process. As Jeff had a fair few people to film with we didn't want her to act anymore than she really had to. Knowing what you want was key and it also keeps you on track, if you don't stick to your storyboard you could run out of time in the end and have too many different options to work with. A big part of this module is about organising time as there is a lot to achieve in a short amount of time.
I thought the filming was quite successful, even though in the first shoot I felt we didn't get enough variety in the shots so my beginning sequence of footage isn't as interesting as I would have liked. Everyone pitched in and help set up and we got to each be the director of our own footage so it was a new experience for most of us.

Sky Replacement
When we filmed out on location, the sky was very grey and bland, so I decided to create a sky replacement to make it more interesting and visually appealing. I had already done a basic one on a test of the first shot awhile back but now I thought it would be better to advance this and create something I was more happy with. I wanted the sky to change colour as the spaceships came into view and I came across this tutorial which proved to be really useful. I took what I learnt here, about adjustment layers and the use of CC Rain and CC Mr. Mercury to create a comp that pushed my skills further.
I took the basics and adapted it to suit my comp. In the first shot I keyframed the different types of colour correction I used on the adjustment layer and sky layer, in order to achieve a gradual change in colour when the ships appeared. Because I did this to the first shot, I also had to do the same on the other two shots after it for continuity. The edit below is not finished at all, there are still tweaks I need to do on the compositing, especially changing the rain effect. Even though it was quite visible when I first made it, it could do with increasing in size so it is slightly more visible to the eye, at the minute it blends too well into the background and the droplets are too thin. Obviously as well, my animation isn't fully rendered, these are just playblasts. It's just in this stage at the minute as I have to send this off to John Waugh, the guy who has offered to do my music for me and the main thing that he needs is for the timing of each shot to be how it is when it is fully finished.
I took the basics and adapted it to suit my comp. In the first shot I keyframed the different types of colour correction I used on the adjustment layer and sky layer, in order to achieve a gradual change in colour when the ships appeared. Because I did this to the first shot, I also had to do the same on the other two shots after it for continuity. The edit below is not finished at all, there are still tweaks I need to do on the compositing, especially changing the rain effect. Even though it was quite visible when I first made it, it could do with increasing in size so it is slightly more visible to the eye, at the minute it blends too well into the background and the droplets are too thin. Obviously as well, my animation isn't fully rendered, these are just playblasts. It's just in this stage at the minute as I have to send this off to John Waugh, the guy who has offered to do my music for me and the main thing that he needs is for the timing of each shot to be how it is when it is fully finished.
Monday, February 25, 2013
VFX in TV compared to film
Murray Barber from The Mill a VFX company down in London did a talk at Animex which I found really relevant and useful for the visual effects module I'm currently working on. Because The Mill does a lot of visual effects for TV, Murray spoke about how they achieved their effects on a budget and a tight deadline. Budget actually plays a big part within TV as it will determine what can be included and if there is time to create something large scale. To overcome this they tend to re-use assets from previous shows, altering them slightly to fit in with their new surroundings. Working in TV, you build up a vast asset library which you need to use to your advantage, it saves time and that time saved can be spent on something that require more detail and effort. Because of time constraints it's best to try and get involved in the script writing stage if possible, this then allows communication between the studio and script writer to advise them what is achievable for the budget and time scale.
Below is a quick making of from The Mill of series 5 of Doctor Who, you can see that even with the time restrictions and budget they are still able to create high end visual effects. Instead of creating numerous amount of set extensions, they use matte paintings, something that requires less work yet produces the same visual effect. It's tricks like these that can work in your favour, why model every tiny detail when it will only be seen from far away.
Working in TV is very much fast paced, especially commercials. In film, you would get far longer working on a section and have the time to make every detail perfect. TV, you have to find the right balance of sending it out on time yet also creating something visually appealing that will grab the audiences attention.
VFX Industry
This year has been huge for the VFX industry, so many blockbuster titles of this year have been heavily involved with VFX, none more than Ang Lee's Life of Pi. I went and saw this in the cinema and was completely blown away by the sheer beauty of it and the scale of the whole project itself. Because of it's tremendous job it was no surprise that Life of Pi was up for an Oscar for Visual Effects, however shortly after the nominations were announced, Rhythm & Hues - the company that created the bulk of the visual effects filed for bankruptcy. For myself and many others this came as a huge shock, a well established and reputable studio who just made one of the most visually stunning films in a long time were in a lot of financial trouble. Back in September another well known VFX studio, Digital Domain, had run into financial troubles which led to them closing down a studio out in Florida.
We as artists love what we do and because of this love, we aren't too bothered if we get the recognition as we all work behind the scenes. It's only when people start loosing their jobs and are under paid and have to work all hours, when people have something to say. Without these people, without these companies and studios visual effects work, it's as simple as that. The Oscars took place last night and around 500 people took to the streets to protest about the state of the VFX industry.
The protest is not a strike, "it is an effort to raise awareness," explained VFX supervisor Scott Squires
A lot of people were hoping that Life of Pi would win the Oscar for Visual Effects (which they did) and use that as a stage to create more of an awareness about the industry. They tried, but got cut off mid speech which gives you the impression that they couldn't care less. I'm hoping that this just pushes everyone more and gives them more determination to make their stand. It will be interesting to see how this will affect the VFX industry in the up coming months and hopefully it will be for the better. Here is an interesting interview about why the VFX industry is failing. A big thing to come up time and again is the model the VFX industry use, it's far different from any other within the film industry. In order for something to change within visual effects, the model they use needs to change.
Oscars 2013 - Life Of Pi Wins Best Visual Effects from Nathaniel Caauwe on Vimeo.
Saturday, February 23, 2013
Rendered Alien
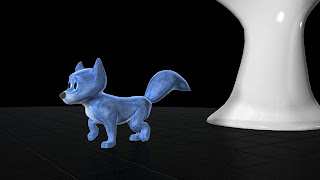
The first image below is my final concept of my alien with the colours I planned to use, and the one below that is the fully rendered version. Originally my plan was to have it coloured more towards pink / purple, this was because I got feedback from people of my colour choices to see what they would prefer the most. I quite like the pink choice and so I went down this route for a bit, however as much as it looked quite nice in Photoshop, once I placed it on my alien it looked too much like skin and it didn't have enough depth to it. Instead I decided to take my mesh of my alien into Mudbox where I would be able to paint on a lot more detail. Using the Fur stencil and applying it as a projection I was able to quickly achieve a fur texture. I realised also, that the original uv map I created wasn't suitable enough for painting on, so I had to re-do it.
I wanted to try out Roadkill UV - a freeware application that is a much faster and far simpler way to unwrap models, however it's not available for mac so I passed it onto my friend to do it. The process itself is quite similar to how I would normally create my uv's within Maya. Within Roadkill, you are mainly just cutting edges to separate pieces and to create seams for each piece. As you cut away, Roadkill will automatically unwrap the uv's for you, whereas in Maya you have to tell it to do so and are needed to select many more edges and go through different process before you get to the final layout. It's not great for laying out the pieces of the uv though, so it's best to reposition it within Maya before exporting it out. For Mudbox however, when exporting the geometry the uv's go along with it so unlike with painting in Photoshop where you have to take a UV snapshot, this isn't needed.


I wanted to try out Roadkill UV - a freeware application that is a much faster and far simpler way to unwrap models, however it's not available for mac so I passed it onto my friend to do it. The process itself is quite similar to how I would normally create my uv's within Maya. Within Roadkill, you are mainly just cutting edges to separate pieces and to create seams for each piece. As you cut away, Roadkill will automatically unwrap the uv's for you, whereas in Maya you have to tell it to do so and are needed to select many more edges and go through different process before you get to the final layout. It's not great for laying out the pieces of the uv though, so it's best to reposition it within Maya before exporting it out. For Mudbox however, when exporting the geometry the uv's go along with it so unlike with painting in Photoshop where you have to take a UV snapshot, this isn't needed.


Sunday, February 17, 2013
Rough Edit
As I put in a previous post I created a rough edit of my final film in order to send this off to John who was doing my music. Not only did he need it to compose the music, but it was also good for me to see what I wanted to achieve in the time given. I actually went through quite a few rough cuts, and kept adapting them as I progressed through the project. In my storyboard I originally had a shot of the alien jumping through the branches of the tree, however when it came to animating this it was such a quick shot that it seemed pointless putting it into my final film. I got told that it normally takes the viewer nearly 2 seconds to take in what is on screen and this shot that I had animated was barely 1 second, so it made sense to take it out.
I created an animatic after drawing up my storyboards (which I never got round to posting until now) which gave me a rough timing to work to. At this stage we had filmed some of the footage so I put this in place to see where I would cut each shot. By doing this you are able to get a much clearer idea of timings and I was also able to work out how long my animated shots could be. Seeing as the film itself can't be over 1 minute, I wanted to get a good balance between live action shots and animated ones within Maya. Rough edits really help you plan out your shots and keeps you working to that edit so you don't go off track and create more than you need. It can be a huge time saver in the end as you are not working on bits that will never be shown and also rendering times will be cut down. Also within industry, these rough cuts will also be shown in order to give the go ahead on a project and also give the rest of the team something to work with.
I created an animatic after drawing up my storyboards (which I never got round to posting until now) which gave me a rough timing to work to. At this stage we had filmed some of the footage so I put this in place to see where I would cut each shot. By doing this you are able to get a much clearer idea of timings and I was also able to work out how long my animated shots could be. Seeing as the film itself can't be over 1 minute, I wanted to get a good balance between live action shots and animated ones within Maya. Rough edits really help you plan out your shots and keeps you working to that edit so you don't go off track and create more than you need. It can be a huge time saver in the end as you are not working on bits that will never be shown and also rendering times will be cut down. Also within industry, these rough cuts will also be shown in order to give the go ahead on a project and also give the rest of the team something to work with.
Saturday, February 16, 2013
Spaceship Interior

 When trying to come up with a design for the interior of the spaceship I knew I wanted to keep it simple as I did not want to over complicate things, and also have the possibility of running out of time for completing it. When I was looking for inspiration I came across some hotels that had a very minimalist / futuristic feel to them, especially within their spas. I really liked this design as it was very clean cut and did hold a futuristic feel to it.
I had a rough idea of what I wanted after finding some these spas as inspiration so I drew up a really quick idea and then took it into Photoshop to test out some colours. I knew I wanted my interior to be bright and reflective to add more to that simplicity look and feel. Also as my character was going to fairly colourful, not sticking to the norms of animalistic colour conventions, I didn't want the interior clashing with my character. The colour scheme I came up with was quite muted and when it came to painting the texture for the inside of the dome, it didn't feel right, when placing behind my shot footage, I found that Jeff (my actress) didn't sit very well within the background. It ended up looking too fake and it wasn't something I wanted at all. I felt that if I used a free texture I would be able to achieve a more realistic setting where the two components, both actress and backdrop would be able to fit nicely together.
The last image, you can see is one of my rendered shots. Initially I tried using blinn shaders to achieve a specularity and reflectivity on the objects, however I found that I couldn't control it too well and was not able to get the effect I was looking for. Instead it was suggested by a friend that I use a shader within Maya called: mia_material_x. This shader works really well with mental ray and as you can see, produces really nice reflections. Mia materials can only be rendered using mental ray as well. Because it turned out really well I ended up using it for the floor and on my alien character too. With the floor there is also a bump map plugged into it to give more depth. The alien also needed a reflection map as with using mia_material_x, everything has specularity on it, so you need a map to tell it where to not have it e.g. everywhere apart from the nose and mouth.


Thursday, February 7, 2013
Rigging / Blend Shapes
As my character is a quadruped, I knew the rigging set up would be slightly different so in order to get to grips with this and create a fully working rig, I followed tutorials online which gave me a basis to work from. My previous knowledge of rigging still came into use with mirroring joints and putting in IK spline. I found that researching into a cat's skeleton was really useful as this showed me where to put the joints and also the names. With cats, they have an extra bone on their front legs above what essentially would be the ankle, this allows more movement and flexibility. Because of this set up, the placement of the IK's would be slightly different to how a biped would be, so I added in an extra IK between the joints to allow for this movement. I realised that after I rigged and weight painted the model, I could have done with less joints in the neck as a few of these aren't really needed and it would have been easier to weight paint with a couple less. I originally planned to include joints for the eyebrows as this would allow me more control over this area, however I ended up forgetting to put these in and I would have had to unbind the mesh and do it all over again. Instead I had created blend shapes for the eyebrows, including the main expressions I will need.
Using the component editor was something I came across within the tutorials and found it a really useful tool. By going into component mode you are then able to select certain verts and adjust their influence. This is a more accurate way than just weight painting and allows more control, obviously this should only be used for small areas, areas where it's hard to weight paint or where some adjustments are needed.

When it came to creating the blend shapes I came across a major issue, when using the blend shapes they ended up distorting the mesh in areas that were not modified in any way at all. I was told by my tutor that some way along the line the mesh got distorted from the original one, and seeing as I duplicated the mesh before I bound it every time the blend shape is used, it always wants to go back to how it was, hence the deformations in other areas of the geometry. To try and fix this problem we first unbound the mesh from the rig and exported this out separately, by doing this I then had the original mesh back. I then imported it into the scene I was working on and began to detach all the heads of my blend shapes from the body. Seeing as only the tail and right front foot was affected, I would not have to re-do all the blend shapes again. After this I then re-attached the heads to the new body. At first this seemed like it would work, however in the end the blend shapes became destructive. We found that only a couple were really destructive, so by taking those away and duplicating a blend shape that worked correctly, we used that as the new geometry. This process took longer than I anticipated especially seeing as I had to re-weight paint my character and attach all the controllers again, however it is still better than having a broken character! I have learnt many new things so it wasn't a waste of time, and also by having to re-do certain aspects I understand the process more and am able to do it in a much faster time than before.
Subscribe to:
Posts (Atom)