Below are my storyboards for my animation along with the animatic. I've tried to time out the animatic as best as I can and hopefully this will be used to aid a possible music composer. At the minute the animation will probably reach around the 2 minute mark (I always find my animation is longer than I originally anticipated from the animatics). For the storyboards I have taken my original story ideas and expanded them further, adding in more detail to each specific shot. As you can see, you can get an idea of how each shot will be laid out, however I haven't put specific camera shots in. I find that I work much better in a 3D space when it comes to layout and composition, so I will be doing this in more detail within Maya once every asset is created. I've tried to describe the key emotions that the dragon will be feeling as to give me a guide when it comes to animating. I will be referring back to my storyboards when I reach the animation stage, staying close to the original concept but possibly improving the composition of the shots.
Showing posts with label Storyboard. Show all posts
Sunday, February 2, 2014
Sunday, April 28, 2013
Storyboards and Pre-viz
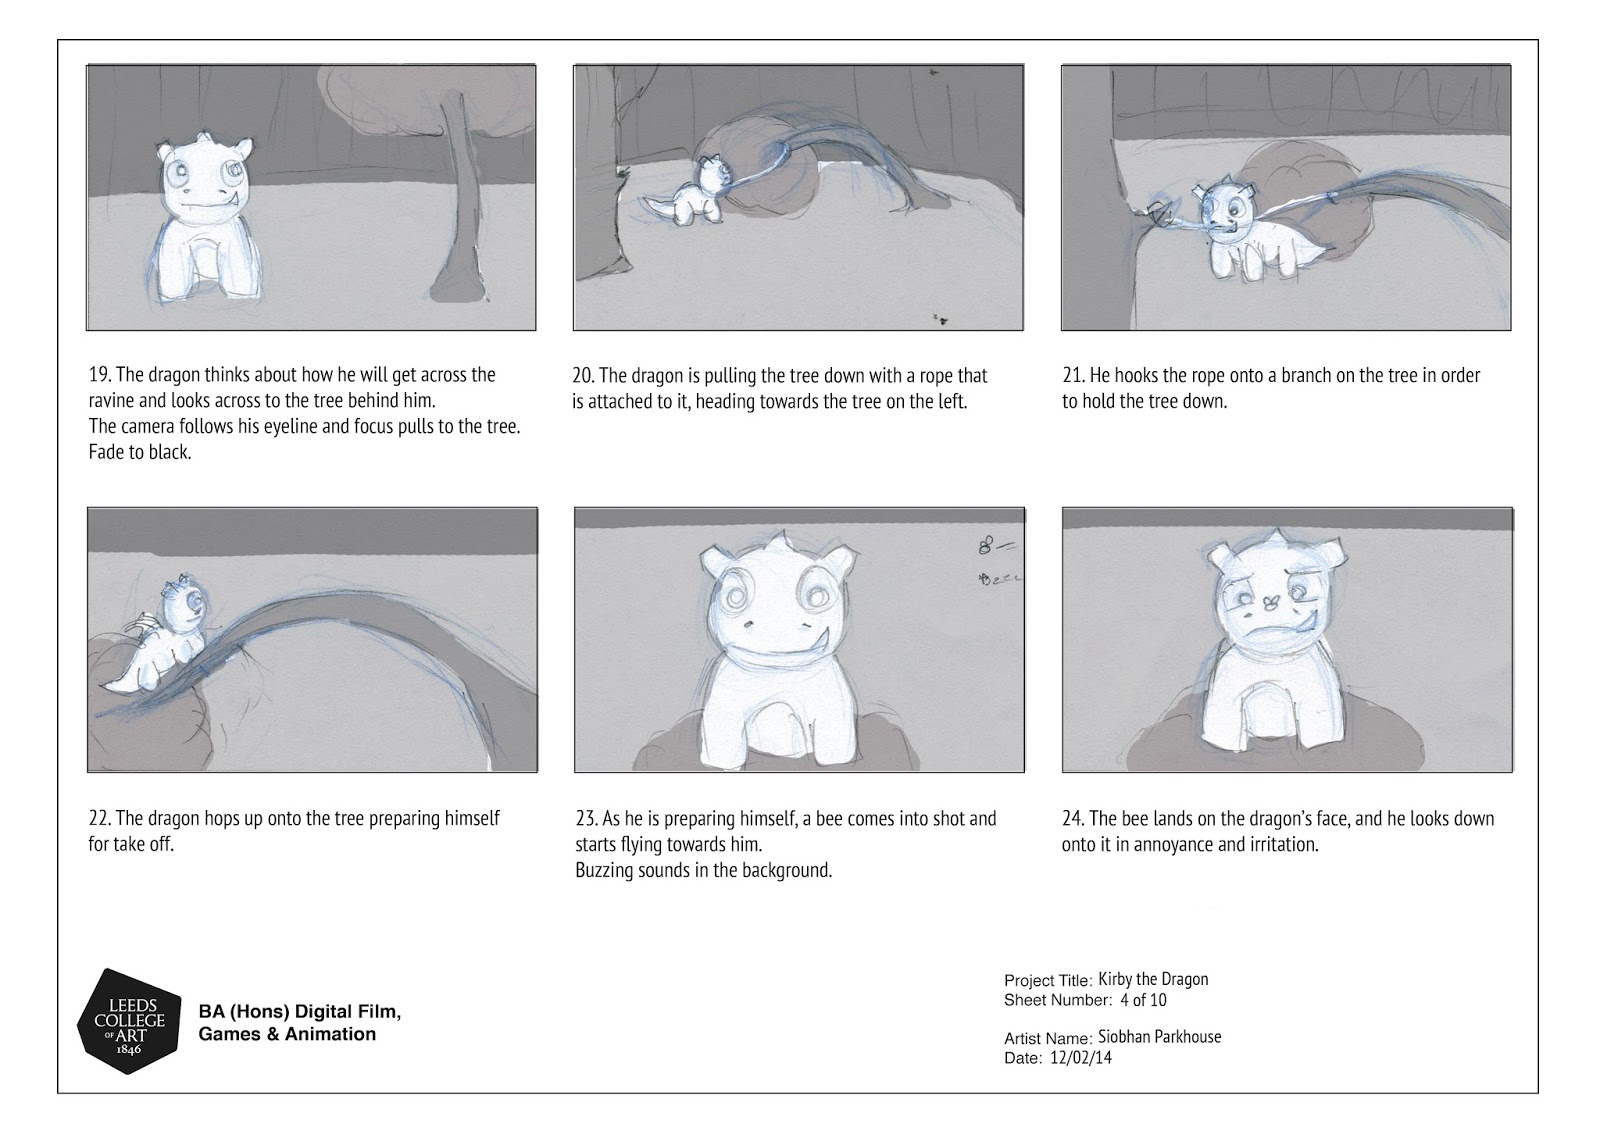
I decided to create a pre-visualisation for my animation (found HERE), this is quite a standard thing to do now within the industry and it's normally the layout team which undertake this part. I did this within a few hours just so I could get a better idea of camera angles and timing of the whole animation. It's very rough and some shots are too fast but it's helped me a lot with understanding the different shots and how it will all look when it comes together. I found it hard deciding upon camera angles without seeing how it would look and work out, so by setting it up and creating some pre-viz it helped make my ideas more concreate, and was also able to see what bits still needed improving upon. Visualising in a 3D space is much easier for me to get my head around, and from the pre-viz I was able to complete my storyboards with my chosen camera angles.
The characters that I used are the ones I'm going to be using for my final animation, using them rather than just any model gives a better sense of how the shot is going to play out and how they would fit within the scene. The trees that are shown were just used for layout purposes, I won't be using these ones as they are just from Maya PaintFx and aren't great. I'm getting a friend to work on the trees for me and using the PaintFx ones, also helped him get a better idea of where I was going to be positioning them and in what quantities. In some places there are no trees visible in the pre-viz, mainly because they were very heavy on my computer's processor and I wasn't able to put them in there, they are drawn in the storyboards however. Because of already working out some of the timing in the pre-viz I don't think it's necessary to produce an animatic, however I may go back and add in the dialogue to the pre-viz once it's recorded in order to see how it will all work out together as a whole.
Thursday, January 17, 2013
Invasion Storyboard
So here is my storyboard for the Invasion shoot, we got given the first four shots, however I am going to be adding a few extra things such as extra spaceships when it comes to compositing. The basic idea though is that there is an alien invasion and the photographer gets abducted into the spaceship where it is up to us to decide what is going to happen to them. As you can see from my storyboards the photographer sees a large tree in the distance and something moving, this turns out to be the alien and while it appears cute and friendly, as soon as the photographer takes a picture of it, the alien gets really angry and pounces on them. An animatic will shortly follow as this needs to be sent off to John Waugh, the person who is going to be composing my music for me. I need to work out the timings of each shot so I know my time limits and also John knows what he has to work with and how long the changes are in between the main shots.
I think I'm being quite ambitious with this project, especially for the time scale of it. I need to learn how to rig a quadruped character, get the topology of my model correct, try and create my character with fur and as I want to specialise in animation, I really need to concentrate and look at a lot of reference videos and make sure I nail the timings and how my alien moves. If worst comes to worst and I do not have time to include fur onto my character, I will just apply a texture onto it. I will still be experimenting with it so I will have the research to back it up.
Monday, November 21, 2011
1 Minute Instructional Video - Storyboard
This is the storyboard for my 1 minute instructional video. It shows the key frames I want to show in my video, all of which are the important parts in creating s'mores. My establishing shot is showing roughly what is needed and then it moves on to a more specific shot of the ingredients. I have a lot of close up shots as the point of it is an instructional, so the details need to be prominent. There would be no point in having an important part as a wide shot as then you would not be able to tell what is going on.
Monday, October 17, 2011
Dan Root - Storyboard
Storyboard
For this part of the brief we had to create a storyboard which we would then ultimately turn into a flipbook and then a short animation sequence. Below is the idea I had which I drew up and then placed the images into the storyboard template.
The idea is that my character starts off with her hood up and then gradually pulls it down and at the end cocks her head and smiles. Originally I was going to have her running and jumping, however I thought it would be far to complicated to achieve the movements in 20 pages. I instead played it safe by doing something I knew I could draw. I will definitely try to progress my drawing skills further throughout this course as I feel that they are a little under developed at the moment.
Subscribe to:
Posts (Atom)