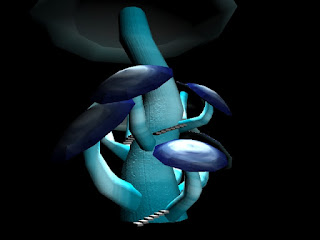
The next two images are the textures that I preferred the most, they look more natural than the previous two, even though this giant mushroom tree is on an alien planet, it is still an organic form so the texture still needs to be appropriate. These two textures were originally from tropical trees and I think they both fit quite well. I have decided to use the bottom one as the the texture wraps round the stems better and makes it more cylindrical, I think I will have to adjust the bump depth though as at the moment, it is a bit too prominent.
Friday, April 13, 2012
Texture Tests
I have tried out various different textures to create my bump map, this will create more of a 3D texture on my mushroom, otherwise if it was just the basic colour it would appear too flat and not have enough dimension to it. To create the bump maps I gathered different textures from http://www.cgtextures.com/ (a site where you can obtain and use textures for free) and then desaturated them on Photoshop for it to be then inputed within Maya. By adjusting the bump depth attribute you can change how much of the texture is shown, in other words this value can change how 'bumpy' the texture is. It is better that the bump mapping is quite subtle as it is very easy to go overboard with this, the slightest change in value can drastically change the look of it. It took me awhile to get the right texture and to figure out how best it was to layout within Photoshop. I realised that you would have to tile the texture quite a few times to achieve the right consistency and also you must use the clone stamp or healing brush tool to cover up any gaps in between.
Subscribe to:
Post Comments (Atom)


No comments:
Post a Comment