I wanted to try out Roadkill UV - a freeware application that is a much faster and far simpler way to unwrap models, however it's not available for mac so I passed it onto my friend to do it. The process itself is quite similar to how I would normally create my uv's within Maya. Within Roadkill, you are mainly just cutting edges to separate pieces and to create seams for each piece. As you cut away, Roadkill will automatically unwrap the uv's for you, whereas in Maya you have to tell it to do so and are needed to select many more edges and go through different process before you get to the final layout. It's not great for laying out the pieces of the uv though, so it's best to reposition it within Maya before exporting it out. For Mudbox however, when exporting the geometry the uv's go along with it so unlike with painting in Photoshop where you have to take a UV snapshot, this isn't needed.
Saturday, February 23, 2013
Rendered Alien
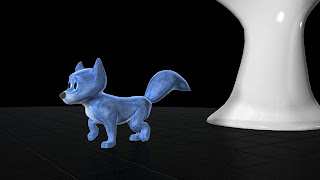
The first image below is my final concept of my alien with the colours I planned to use, and the one below that is the fully rendered version. Originally my plan was to have it coloured more towards pink / purple, this was because I got feedback from people of my colour choices to see what they would prefer the most. I quite like the pink choice and so I went down this route for a bit, however as much as it looked quite nice in Photoshop, once I placed it on my alien it looked too much like skin and it didn't have enough depth to it. Instead I decided to take my mesh of my alien into Mudbox where I would be able to paint on a lot more detail. Using the Fur stencil and applying it as a projection I was able to quickly achieve a fur texture. I realised also, that the original uv map I created wasn't suitable enough for painting on, so I had to re-do it.
I wanted to try out Roadkill UV - a freeware application that is a much faster and far simpler way to unwrap models, however it's not available for mac so I passed it onto my friend to do it. The process itself is quite similar to how I would normally create my uv's within Maya. Within Roadkill, you are mainly just cutting edges to separate pieces and to create seams for each piece. As you cut away, Roadkill will automatically unwrap the uv's for you, whereas in Maya you have to tell it to do so and are needed to select many more edges and go through different process before you get to the final layout. It's not great for laying out the pieces of the uv though, so it's best to reposition it within Maya before exporting it out. For Mudbox however, when exporting the geometry the uv's go along with it so unlike with painting in Photoshop where you have to take a UV snapshot, this isn't needed.
I wanted to try out Roadkill UV - a freeware application that is a much faster and far simpler way to unwrap models, however it's not available for mac so I passed it onto my friend to do it. The process itself is quite similar to how I would normally create my uv's within Maya. Within Roadkill, you are mainly just cutting edges to separate pieces and to create seams for each piece. As you cut away, Roadkill will automatically unwrap the uv's for you, whereas in Maya you have to tell it to do so and are needed to select many more edges and go through different process before you get to the final layout. It's not great for laying out the pieces of the uv though, so it's best to reposition it within Maya before exporting it out. For Mudbox however, when exporting the geometry the uv's go along with it so unlike with painting in Photoshop where you have to take a UV snapshot, this isn't needed.
Subscribe to:
Post Comments (Atom)


No comments:
Post a Comment