Wednesday, November 30, 2011

Digital Film Production

The second half of the brief will be to produce two, up to 2 minute video responses to the written work produced by the Tadeeb Writers Group. They have developed poems and short prose based on their workshops at Ilkley Moor. This part of the module is running in conjunction with The Stanza Stones project developed as a collaboration of the Ilkley Moor Literature Festival and Simon Armitage.

We got split into groups and chose a poem from random. For now the basic roles we have given ourselves within our group is:
  • Myself - producer
  • Lija - storyboard artist
  • Tom - editor
  • Rhys - cameraman
The poem we got was written by Zenam Bi called 'Define Me?'. When reading through this poem the first word that seemed to jump out at us straight away was 'puppet'. Going off this word we started to gather ideas together, starting off with different videos as reference. 


This gives us some reference to how Chicago was able to portray humans as puppets. It shows their movements and where the strings are attached to their body. Not only do their movements have to mimic a puppet but their facial expressions have to as well, without this it would not give a convincing performance. At the moment we really like the puppet idea, having a person attached to strings that are controlling her movements/actions in certain ways.

We started pulling other ideas together, coming up with a few different versions. We thought about picking out key words from the poem itself and possibly have them onscreen while the girl would respond to these. Like a voice in her head that she is fighting against. Below is the actual poem with the specific words and phrases we picked out.


As producer I have written out the idea of what we have come up with and colour coded them to specific areas. By doing this it is easier to identify certain parts and you are able to see if ideas are repeated or not.


Sunday, November 27, 2011

Stop Motion Animation

Until now, I never realised how many different types of stop motion animation there was. I was only really aware of a few types the main one being clay animation (Aardman), the rest honestly I didn't even know the names of.
  • Clay Animation
  • Pixilation
  • Pinscreen
  • Graphic
  • Object
  • Direct Manipulation
  • Cutout
  • Timelapse
  • Model & Puppet
Under clay animation, there are also various sub categories. The one that caught my attention was clay painting. Below is an animation by Joan Gratz - 'Mona Lisa Descending a Staircase' (1992), I actually came across this animation awhile ago but never knew how it was created. I now know it was done by painting with clay. I really like this piece as it uses very famous art works: Picasso, Dali, Da Vinci yet merges/transforms one painting into another with subtle changes. It brings fine art paintings to a new audience, people who are interested in animation and combines the new and the old together. Unlike the other types of clay animation this is not 3D in any way, it has been created on a flat surface where the clay can then be manipulated to change the scene.


Another type of animation that caught my interest was pinscreen. Pinscreen animation is where a white screen is used that consists of many of thousands of very fine pins. By lighting both sides of the pinscreen it casts shadows over each individual pin. The farther the pins are pushed out, the darker the screen gets and vice versa. I find it really hard to get my head around this technique as it is not something I have come across before. To me I really don't understand how people are able to achieve such good images from some pins and lights. Alexandre Alexeieff and Claire Parker pioneered this technique and I find their animations really stunning, more because of how it was created and how much time it would have taken to create something like this. There must have been a lot of through process behind this, more planning than possibly any other animation would need. It would have to be precise too as each pin could produce a different shadow, you would need to make sure that everything was in the right place in each scene.

Film Theory 1 - The Auteur

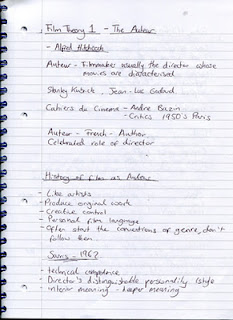
For the next few weeks we have 3 lectures on film theory, each looking at a specific area within that. This week the lecture was on The Auteur and was focusing mainly on Alfred Hitchcock. An auteur is normally a director whose movies are characterised by a filmmaker's creative influence. They are similar to artists in the way that they produce original work and have their own creative control. In the 'Auteur Theory' by Sarris (1962), he explained that they should all have a technical competence and that the director's distinguishable personality should be able to come through within the movie. The technical competence of the director in Hitchcock's case was that he was able to tell his story visually in the silent era; he used montage and cutting to create tension within his films; the use of subjective camera - the point of view of the character in the film. All their films should have an interior meaning - a deeper meaning than what is just seen on the surface.

Hitchcock himself is said to be the master of suspense and that he was influential in later genres such as 'slasher' films. In 1920 he started off in the film industry by drawing sets and continued his apprenticeship alongside Graham Cutts at Gainsborough. In 1927 Hitchcock produced 'The Lodger', this was his first acknowledged film, he created clever and creative ways to show things through silent film. For example he shot through a glass ceiling to show visually someone pacing, he had to do this as this was the silent film era. Hitchcock created another film called 'Vertigo' and this was where he used the now famous 'dolly zoom' technique. This is where the camera is placed in certain places to give the viewer the feeling of unnerving. In 'Vertigo' it was placed from high buildings to give the sense of height and portray the characters emotions towards it.

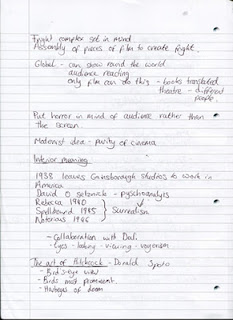
Alfred Hitchcock was also famous for using cutting and montage. In 'Psycho' wanted to put horror in the mind of the audience rather than on the screen, and he had to show it in a way without it showing anything inappropriate for the time. To do this he used cutting and montage. Hitchcock describes cutting as almost severing and montage as the assembly of pieces of film. He creates juxtaposition of the imagery in various sizes to create the shot. It is down to pure cinematics, how the assembly of film in a particular order can instantly be changed to create a new idea and meaning.

As Sarris said, an auteur's film should have an interior meaning, in Hitchcock's case this came into play when he left Gainsborough Studios in 1938 to work in America. There he met David O Selznick who introduced him to psychoanalysis. From this they went on to create Rebecca (1940), Spellbound (1945) and Notorious (1946), all exploring the ways of psychoanalysis. In a way it relates to surrealism and in actual fact, Hitchcock collaborated with Salvador Dali for the dream sequence of 'Spellbound'.

People may say Hitchcock was a brilliant auteur, however there are criticisms of the auteur. Even though the film can be sold to audiences under the director's name, it disguises the work of all others. What about the cinematographer, editor, sound technicians, screen writer and art director? By referring to only the auteur of a specific film you are almost undermining the work of others. They will never be able to get the credit they deserve. Without all the other people behind the scenes Hitchcock and other famous auteur would not be able to produce the film they want. Yes the auteur is in control of the film itself, yet they can never have full control as it is always a group collaboration. Hitchcock mentioned that only film can be shown round the world where nothing has to be changed, people will be able to understand what is going on. It is not like books where it has to be translated and some meaning are lost; or even theatre where there is a different cast and their acting is not the same as the original cast. Is this true though? Can film offer a universal view of quality? Surely there will be some disagreement of views, not everyone will think the same or get the same meaning out of the film. You can achieve a basic and simple meaning however everyone looks at things in different ways.

Through this lecture I have learnt that there are good and bad points to an auteur, they are very creative in the way they convey their ideas however I feel it isn't right that the films they produce are known under their name. More people should get credit for it. Collaboration is key in any for of media where it be film, games or animation. No one person can do it alone, you need to build up good relationships with the people you work with. With this you create a good communication and the overall product will in turn become better. Auteurs are involved in the bigger picture, the art community around them. They visit galleries, read up on books etc. This is quite useful as you are then able to bring different medias together and open it up to a wider audience.


Saturday, November 26, 2011

Maya - Animation

This week was getting to grips with the basic animations using Maya. To start with we learnt about how to key frame using the auto key frame button. I produced a simple animation using a sphere primitive to show movement and scale.


After this we looked at the graph editor. This is where you are able to change key frames more specifically without having to delete them from the actual timeline. You are able to move them from one key frame to another, edit certain points and create more of a fluid motion using tangents. This next animation was just to make a pendulum swing back and forth using the rotation as key frames.


With this exercise the aim was to create a block of animation where if it was on loop you wouldn't notice that it was only a short section. When on loop it should be seamless and flow really well. One of the ways to do this was to duplicate the animation sequence on the graph editor and overlap them with each other. This will create easing in and easing out - one of the 12 principles of animation. Seeing as there were multiple parts to the pendulum as well, by overlapping this will cause the separate parts to move one after another allowing a more fluid movement. Another way was that I had to place pre-infinity and post-infinity curves using the graph editor. With the curves in place I then had to add in new key frames (see picture below). This was to ensure that the movements would flow correctly and smoothly after the block of animation had ended. Once the new key frames were in place I deleted the old ones and reshaped some of the curves to make them fit in with how they were before. It took me awhile to get the hang of this as to begin with I wasn't sure if I had to place the key frames on the dotted line or just anywhere. The main thing was to get the pendulum moving as smooth as possible and I think I managed this quite well in the end.


Using the same pendulum model the next part was to make it move and stop abruptly causing the bottom half to swing back and catch up on the top half of the pendulum. I actually struggled with this exercise and I couldn't get the pendulum to stop fast enough. It took me awhile to achieve what I wanted and needed a bit of help from other people to tell me what I needed to be doing. In the end I got it moving in a way I was really happy with however when I came to play it back again using the timeline, something went wrong and the pendulum kept jumping back to its origin halfway through the sequence. Apparently there were key frames on my timeline that was causing this however they were not showing up on my graph editor which meant I could not alter this in any way. I ended up having to re-do the whole thing as I didn't save it before. The final one I did was not as good as the previous one but below is the video with an image of how the curves look on the graph editor.


The final one we had to do was a bouncing ball animation. After setting the basic key frames I realised that the movements were too smooth so I went into the graph editor and tried editing the tangents. I changed them to linear and then back to spline, by doing this it took out the smooth points between each bounce and made them more sharp. With this it then causes the ball to bounce back up more quickly. I feel that I am getting to grips with animating, I will just have to practice a few certain areas like playing around with the tangents to edit the animation more.


Friday, November 25, 2011

Final Video


This is the final video for my 1 minute instructional video brief. I am quite pleased with how it turned out, with a lot of editing I managed to produce something that I am proud of for my first video. After watching it back there are a few things I have learned through creating it. There are shots where I could have zoomed out more to show a greater scene and not have all the shots at the same close up. I filmed this all myself and I realised it would have been a lot easier if I had someone else to help me. I would have been able to see what I was filming better and not needed to re-shoot as much. There are small parts where I could have moved things out of the shot to improve the overall look. For example I got the bin in the reflection of the microwave, in film the art director would normally position objects and work out what looks best where. The next time I produce a video I will have to pay extra attention to these things so I can improve on what I have done this time.

In my crit I was questioned to why there wasn't any sound in my video e.g. sound from pans, bowls, microwave etc. I explained that as my kitchen was too echoey the sound would not have come out really well, especially as the cameras we used could not have an external mic attached to it. I could of however created some foley sounds down in the sound booth - so this could be an option to try out next time.

Wednesday, November 23, 2011

Mainframe

When I went to the talk by Mainframe at Bradford Animation Festival, they gave us a preview of one of their new adverts. It has now been released and I found a short explanation of what was done and why on 3D World www.3dworldmag.com


I actually really liked this the first time I saw it. I was intrigued by the small movements the ants made and the small tiny details added onto them. When you look closely you can see the individual hairs and that each ant has their own movement pattern. The main thing whenever animating a certain object or thing is to reference. Mainframe was no different, they got their reference from a BBC documentary. Without doing this they may have not been able to get the movements to replicate how a real ant moves, and it might not have come across as realistic enough.

The idea itself is quite clever as ants tend to work like clockwork, having specific actions and the whole colony working together to get things done. This is just like a clock, all the components need to work together in order for the clock to work.

1 Minute Instructional Video - Editing

After I had filmed the shots I needed, the next stage was editing. I had a problem with my clips as even though I had imported them using Final Cut Pro, I didn't use Log and Transfer. This resulted in my clips being in H.264 - not suitable for editing, they should of been Apple ProRes. Luckily I was able to convert my clips over to the Apple ProRes format - I will be certain to use Log and Transfer next time.

When it came to editing I previewed my clips and cut them down to a suitable length. Even with all the relevant clips cut down I found that the whole video ended up being a lot longer than a minute. Someone pointed out that I didn't need specific clips as I was almost repeating myself, I didn't notice this until they said this. After that I found it much easier to cut out extra bits and in the end I managed to get my video to a minute.

There were a few specific things I did to my video to make it how I wanted. There was a part where I wanted to show the water boiling, however if I showed the whole sequence it would have been far too long. To reduce the time length down I thought of speeding up the clip, I ended up speeding it up by 800%. I think it worked quite well and I separated part of the clip off to bring it down to normal speed to show a specific action. If I didn't do this it would have resulted in that part being too fast and the viewer not being able to catch what was going on.

Once I had got the desired length of time and effects in my video I watched it back to see how it flowed from one shot to another. I saw that it worked quite well, however I wanted to put a fade in at the beginning and a fade out at the end. To do this I changed the opacity on the first and last clip, setting key frames in the appropriate places. There was another way I was shown, by putting in a solid colour matte and having the clip fade in from that, however I found that changing the opacity was a much easier and quicker way of doing this.


Originally I was going to have a voice over in my video. (I tried doing it straight from the camera however my voice ended up being too echoey in my kitchen.) I thought about using the sound recording booth in uni, but after watching my video back I realised it was pretty self explanatory anyway and there was no real need for a voice over. From this I decided to have a look at what music I could put in it to make it a bit more interesting rather than just having a basic video. I was told to look through http://freemusicarchive.org/ - where you are able to obtain legal audio downloads which can be used for your own personal use (some may have other restrictions though). I couldn't really find what I was looking for and as there was such a vast library, I couldn't even begin to search what I was trying to look for. I wanted something happy and cheery yet with no lyrics. I decided to check out Soundtrack Pro - a programme where you are able to edit and compose your own tracks from either your own media or media from their search library.

This was much easier to search for what I had in mind and shortly I was able to find my desired track. I had to edit the track slightly as it was too long for my video and I particularly wanted the ending. It took me awhile to find the right point at which to cut it at and then combine it with the ending. I had to make sure the whole thing sounded right and there were no obvious jumps within it. After I had done this I saved it as an AIFF file in order for it to be used in Final Cut Pro.

With sound you have to make sure that on the audio metre the sound does not go over -12, as anything above this will not sound right and be too high pitched. You can just drop the decibel metre down however by doing this you may reduce the sound too much and it can be too quiet. To be more precise I used the pen tool to add points and manually raise and lower them to get the correct levels on the sound. I wanted the sound to be even and be at the right tempo.

Monday, November 21, 2011

1 Minute Instructional Video - Storyboard

This is the storyboard for my 1 minute instructional video. It shows the key frames I want to show in my video, all of which are the important parts in creating s'mores. My establishing shot is showing roughly what is needed and then it moves on to a more specific shot of the ingredients. I have a lot of close up shots as the point of it is an instructional, so the details need to be prominent. There would be no point in having an important part as a wide shot as then you would not be able to tell what is going on.


How To Videos

In order to get some ideas of what already is out there and what I could possibly do for my 1 minute instructional video; I have looked at other how-to videos around my idea, S'mores.


The video above shows the basic steps of creating s'mores, the background is of a plain colour so the eye is concentrated on the main subject. It looks as if this video was created with just the one person with a camera on the tripod, as only the hand is seen at the start and the positioning is coming from the side. The shots themselves are the same, close up/medium close up but then you don't need anything more than this as you are only concentrating on the process and the ingredients.

There has been post-production which has taken place after the shooting, where the ingredients have been placed into the first scene. In every other scene there is a 'Step 1' etc to show which stage it is. Even though it is not that necessary I think it does work as the voice over goes on the top of it. I was thinking about having a voice over but I will see how my video turns out, it may not be needed if I am able to articulate the processes well.

Another video I looked at was more of a conventional 'cooking' style video. This one has a variety of shots from a mid shot to a close up and a wide for the establishing shot. It is very straight forward and tells you what you need to know. For mine though I want it to be a bit more upbeat and so I think I will have a relevant soundtrack to place on top. I like the idea of having real close ups of the ingredients to specifically show what is needed, rather than having a word list. I may take this idea on board and incorporate it into my film.

Thursday, November 17, 2011

Maya!

Today was the briefing for another new project: Fundamentals of 3D Modelling and Animation. Basically I have to create a short 3D CGI animation with the title: Little and Large basing it off a simple toy a small child might play with. I will need to take photographs of my object and be creating storyboards and animatics before the modelling stage.

As this was the first time that most of us had used Maya, we had to follow a short tutorial on how to create a truck. I previously bought 'Introducing Autodesk Maya 2012' and had a quick go at one of the tutorials in there; this was helpful as I knew the basics from this and it was a starting point in which I could progress from. On the whole I thought I picked up the main things quite quickly and I didn't have too much trouble with it. The only problem that I came across was the snap command, I didn't really understand it at first, but once it was explained in more detail I got the idea of it. I feel that I will have to practice this technique a few more times to get used to it a bit more.


After I had finished with the truck I decided to try and model a toy train. I just picked an image off the internet for reference - it was very simple and the shapes were almost the pre-made primitives. For some parts I had to cut away part of the shape, so to do this I deleted specific faces on that shape. I'm not sure if this was the correct way, as it left a hole at the bottom so I will have to check out the right way to do this. But for the time being as I am just experimenting and getting to grips with the software, I thought it would be okay to do this.


I'm quite happy with the way it has turned out, however I didn't use the snap command so I think I will go back and try it doing this. I think what I might also try doing is adding some colour onto the train. I learnt how to do this following one of the tutorials from the book; it's basic but it defines each shape from one another - I will do this by applying a Simple Shader on each shape.

Wednesday, November 16, 2011

1 Minute Instructional Video

We recently got briefed on our new project: Digital Film Production. The first part of this module we are required to individually produce a 1 minute instructional video from storyboading to filming and editing. I originally wanted to produce an instructional video on how to make brownies, however I felt that even with editing the whole video might be longer than 1 minute. So now I have decided to create one with s'mores, mainly because it is easy to make and would take no longer than a minute (that and they're really tasty!)

With my idea set, I now need to think about shot framing and how this will affect my video. The shots I use will show different things so I need to understand the differences between each.

Extreme Long Shot - Mainly shown to establish setting and could show a grand scale within the landscape. If a single character is in the shot it can show isolation.

Long Shot - Used to show movement and direction from the subject. The whole subject will be visible in the frame and will also establish setting.

Medium Shot - Can show the relationship and any detailed actions between a couple of few characters. Will normally show only half the subject on screen.

Close Up - Easier to see facial expressions and the feelings they may be portraying. Will normally be a detail of the subject e.g hands, faces or objects.

Extreme Close Up - A small detail of the character often enlarged to the point where it creates distortion of scale. With this extreme close up it really brings attention to that area and creates a close intimate relationship between viewer and character.

Having broken down the types of shots, I now need to figure out what will be filmed and what shot types they need to have. I need to start with an establishing shot to set the scene, this will probably show all the ingredients needed. I will then zoom into each of the ingredients for a close up. Producing a storyboard will help me to set up my scenes and figure out what will be shot and when so I will do this next before progressing any further.

This is part of a storyboard by Josh Sheppard. Along with the notes on the side you are able to understand what is going on in each shot and how it progresses to the next. There are different ways of producing storyboards, everyone has their own style. This one Sheppard has produced is quite sketchy and still in its rough stages, however you are still able to establish the main subject of each shot. By putting arrows in the drawing you are giving camera direction so you know it won't be a straight cut to the next scene.

An easy way to start of is to draw onto post-it notes, with this you are able to switch around the scenes and decide which is the best order. From this you can then refine it and you don't need to re-draw the whole storyboard if something does not fit right.

My last storyboard was really short and was very basic, so I think for this one I will try it out on post-it notes to start with to achieve a rough idea. I want to develop my drawing style a bit more and refine it to a standard that I am proud of. I feel like I have let my drawing slip so I need to regain and improve it.

Monday, November 14, 2011

Bradford Animation Festival - Friday

After the professional films I went along to see a talk from Mainframe. Mainframe is a company specialising in motion graphics, animation and visual effects. The managing director of Manchester, Chris Hardcastle showed the different projects that they had worked on over the years and went through some of the process they did to create them. What I found was really useful about this talk was that they had their producer there from their London firm, Emma Phillips. She highlighted many important aspects within the industry about producing work for clients.
  • Always manage expectations - produce storyboards, briefs, animatics to show what you intend to produce.
  • Under promise but over deliver.
  • Schedule - make sure you know what you are doing and when.
  • Create a project development document - breakdown what needs doing, create a check list and a to-do list.
  • Research the legalities to work going on air - there may be some strange implication that could happen which would stop your work from being shown.
Needless to say I was really excited for the talk by Andy Schmidt. Getting to hear about the work that went on to create Cars 2 and the pipline they use at Pixar was really helpful and inspiring. With Cars 2 they had rules of relatability, they had to tell a compelling story to keep viewers on the edge of their seat create appealing and memorable characters; and they also had to put them into a believable world. The believable world would always influence the way in which the character would move and behave.

The pipeline that they follow at Pixar is:

Development - Story - Art - Model - Layout - Animation - VFX - Light - Render

Development - All about research. Research the environments, it's about the believability. Try to make it as perfectly accurate as you can.

Story - Storyboard artists will come in and draw up the shots. It used to be done on paper, however now it is drawn onto a tablet and shown via a computer. After this they would then break down the script into shots and create the animatics.

Art - Gather the inspiration for the character and develop from there. It's all refinement, work on the characters and get feedback and improve on it. All characters go through sculpting, this is to see how it will look like in 3D before the modelling stage. Sculpting ill always see if the character can maintain its original idea, can it hold expressions for example.

Sets - Take Cars 2 for example. As they already had most of the characters from the previous movie, they decided to do 'Car-ification'. This was where elements of cars would be injected into the designs of the environment such as buildings.

Modelling - From the sculpts of the character, this then would be made into a CG model and a rig would be put in place after. The riggers and animators work together and a basic animation is produced for the characters. This ensures that everything works proper, that it can function and maintain its appeal at the same time.

Layout - Character placement, staging etc.

Animation - They would follow the 12 principles of animation as set by Disney. A point worth remembering was Andy said that the characters need to feel like their material - truth to materials. They should move, feel and weigh like that material; otherwise it can pull you away from the believability of it all. You should also study the mechanics of your character, find real reference and imitate it but add the style of the character to it. Exaggerate and enhance, find reference but push it.

VFX - Basically all the effects in the movie get added at this stage from dust to explosions.

Light - Lighting and shading gets added, without this there will be no depth added, no reflections, no emphasis on anything. The lighting sets the mood for the scene so is vital that it is correct.

Render - The final stage. It can sometimes take about 12 hours to render if its data heavy.

I managed to get a quick word with Andy afterwards and his main advice to push forward in this career path would be to just work. Work a lot and work hard. It makes sense, the more work you do, the more likely you are to improve and learn from your mistakes. You will also gather more experience and knowledge in the field.

Do what you love and what you are proud of.

Bradford Animation Festival - Professional Films

I chose to get a ticket for the Friday of BAF as Andy Schmidt a Pixar animator was doing a talk that day. That was my main pull for the day, but I was also interested in seeing Mainframe, a visual effects company. Along with those 2 talks I was also able to watch a selection of professional films.

The professional films consisted of:
  • The Monster of Nix - Dir. Rosto
  • Brandt Rhapsodie - Dirs. François Avril, Morrigane Boyer, Thibaud Clergue, Paolo Didier, Ren-Hsein, Tristan Ménard, Lucas Morandi, William Ohanessian, Lucas Veber
  • A Morning Stroll - Dir. Grant Orchard
  • Plume - Dir. Barry Purves
  • Captain Hu - Dir. Basil Vogt
  • The Girl and The Hunter - Dir. Jadwiga Kowalska
The 3 that interested me the most was 'The Monster of Nix', 'A Morning Stroll' and 'The Girl and The Hunter'. 

The Monster of Nix was quite interesting as I didn't notice it at first but even though the whole thing was computer generated, the bodies in which the head was placed on seemed to be human. They might have shot the body separate and then added the head at a later stage. This style of this short film reminds me of the work of Tim Burton, the way the environment has been created along with how the characters move.


A Morning Stroll was created by the same studio who made the Lloyds TSB adverts - Studio AKA. It was nice to see a difference in the types of animation they could produce. This one starting off being 2D then on the final section 3D. The story itself was based loosely on a real life event, so from this they have interpreted it in their own way. I like how as the years change you can see significant changes, for example how the people react towards one another and the mannerisms they hold. I genuinely really liked this piece and the ending I found was different and unexpected. Definitely try to check it out if you can, but below is a short preview of it.


What really stood out to me about The Girl and The Hunter was the way it had been created. No dialogue is needed to get across the story, the actions have been made clear. I like the style of animation too, the characters are quite simple in the way of their form. The colours are quite dark and muted which matches the overall feel and atmosphere of the background.

Sunday, November 13, 2011

BAF Game - Day 2

Day 2 consisted of:
  • James Busby - Ten24
  • Nick Adams - Blitz Games 
  • Brendan McNamarah - Team Bondi
  • Tony Wills - Eurocom Developments
James Busby from Ten24 explained the types of 3D scanning and how it has progressed over the years. The 3 main ones he covered were laser scanning, structured light and optical/photogrammetry. Laser scanning was one of the first forms of 3D scanning however it was expensive and slow, it would take almost 30 seconds to scan a full human body. Structured light was accurate and would give a high resolution, it is easy to capture expressions using this however it is not quick enough for human poses. The final one he mentioned was optical/photogrammetry, this uses DSLRs and converts the image into data. They project a 'noise' pattern onto the subject which in turn increases the resolution of the final image. By using this is adds extra realism in a quick and easy manner. This technique is mostly used in games and VFX.

Nick Adams came to talk about Blitz Games most recent production - Puss in Boots for Kinect. He specified 4 key areas in which they worked by.
  • Start with the player - they had to focus on the performance of the character, in this case Puss in Boots. The 3 main areas in which actions would derive from would be combat, traversal (cat attributes) and thievery ('cat burglar').
  • Deliver a hero experience - to begin with they tried out Avatering. This is where you take the skeleton of a person and directly impose it onto the character. However they found out that this didn't work too well. From this they tried gesture drive animation. They animated lots of variations of sword play for example. Which ever way the person moved they would then play the specific animation - this worked far better. They would take what the player did and exaggerate it.
  • Working with Kinect - they had to use preemptive gesture here in order to have everything move in time with each other. 
    • Start gesture - detect the start position and prepare the correct animation
    • Mid gesture - full animation would be triggered  
    • End gesture - the whole animation catches up
  • Usability Testing - this highlights any issues, they would test it out on their target audience to see how the players perceived their game. From this they would then make any necessary alterations to improve it. Always test.
Brendan McNamarah from Team Bondi came in to talk about L.A Noire and how they went about creating such life like facial animation. Good performance in games will lift your game. Using motion capture was good for body movements however it didn't work too well for faces. In 2004 they started work on L.A Noire. They didn't want to use markers on actors as it took a long time for them to be put on. What the actor did, they wanted it to be placed straight into the game without any interpretation, so they tried Photogrammetry, first using 4 cameras however it was not enough. With 8 cameras though the performance was incredibly natural and believable. 16 pairs of cameras gave them full coverage. They came across a problem where the character would look so real and alive yet when they stopped talking they would return to the game character and look almost lifeless. To overcome this, they produced lots of expressions and variations of emotions and designers/animations would then cut and paste these in and around the game to keep the continuity.

Tony Wills from Eurocom talked about Goldeneye - the new Bond game. This was purely motion capture where the camera would track movements using an optical system. They would capture the footage in real time in order to speed up production and this would then reduce the need for re-capturing. What I found interesting was seeing different game companies using similar technology yet adapting it in their own way. You get to see the pros and cons of each and the work process that they do to get to their final product.

Over the 2 days it has given me some valuable knowledge into the industry and how they go about working. Referencing and testing is key and stories are important. After seeing the work and development behind L.A Noire I think I will probably go out and purchase it to see the real gameplay. At first I wasn't too interested in it but after seeing the technology behind it I am more interested and inclined to play it.

BAF Game - Day 1

This week I attended BAF Game (The game part to Bradford Animation Festival). This took place over 2 days and had many speakers from different parts of the game industry talking about their most recent work.

Day 1 consisted of:
  • Jay Grenier - Image Metrics
  • Adrian Hon - Six to Start
  • Simon Oliver - Hand Circus
  • Olly Nicholson - Unity 3D
  • Matthew Stephenson and Nick Rodgers - Frontier Developments 
  • Carlton Reeve - Play with Learning

The first talk was by Jay Grenier from Image Metrics. He explained the characteristics of Faceware - a facial animation technology which Image Metrics created. This piece of technology is not necessarily a film or games tool, it's an animation tool. It has been used in many well known films and games such as: 'The Curious Case of Benjamin Button', 'Assassins Creed' and 'Red Dead Redemption'. Unlike Motion Capture, you do not need any markers on the face or body in order for the movements to be picked up. It is able to work from any video feed therefore making it inexpensive. This video would then have to be processed and converted into a specific file in which the Faceware software could identify and break down the video. Faceware itself is not dependent on a specific rig e.g Maya, 3ds MAX, instead it is driven by the software, this means that no matter what 3D programme you are running it will be able to intergrate within that and still work all the same.

The way Faceware works is that once the video is input into the software, it analyses it and you are able to look through the video and find the key poses. Groups are created, normally into brows, eyes and mouth and you are able to set poses to specific areas of the face. The good thing about Faceware is that it seems quite simple to pick up and it does not matter if you specialism is in a specific 3D programme, the same principles would still apply.

Adrian Hon was the next speaker and he spoke about storytelling within games. He mentioned that games which had bad stories still would sell fine, so are we more bothered about the gameplay than the storyline? I myself find that the storyline makes the game, if there isn't a story that gauges my interest then most of the time I will stray away from it and not bother playing it. Adrian mentioned 3 things that would determine what games would be produced.

Risk - for a while video games would of had to go through publishers and they would help to fund and distribute the game. However recently publishers have no wanted to risk not making enough money so are not taking the risk to distribute games with a more unusual storyline or gameplay.

Distribution - In the last 5-10 years, a lot of things have changed to where we play and buy games. For example App store, Android, Steam, Facebook - all these places hold games where you can play or buy them yet you do not have to have any permission to publish your game. This is good and bad as even though really good games are now able to reach the public audience, how do you filter them out from all the average ones?

Funding - this plays a big part in producing a game. You'll need money to do this and normally you would try and get some funding of some sort. The person who may give you funding will demand some input and could prevent good/different games being produced. There is a way to get around this now, sites such as 'Kickstarter' and 'Indie Gogo' allow you to post your game and try and get funding from the public. This is exactly what Adrian and his company Six to Start did with their game 'Zombies Run'. They managed to get their funding goal and even more than they had anticipated so now this allows them to produce and distribute their game.

Simon Oliver explained that today, anyone is able to make their own game. There are so many pieces of software available to help you achieve what you want. Unity being the main one, a game development tool. Simon set up his own company and by doing this it gives you freedom. You are able toe work differently and have the freedom of expression. The freedom to meander - you do not have to have a set goal, you do not need to know what your final product will be like. You are able to experiment.

Olly Nicholson spoke about Unity and the new features the updated version would include. Unity is a free software which enables you to produce and develop your own games. There is a huge community so if you ever need help there are specific websites that would probably answer your question. There are always newer updates with Unity so there will be more specific tools to make creating your game a whole lot easier.

Matthew Stephenson and Nick Rodgers came from Frontier Developments to talk about Kinectimals and their most recent project Disneyland Adventures. Nick Rodgers was the lead animator for Kinectimals. Reference was key for this game not only did they take reference from cats, but for the movements they wanted to produce they found that dogs were a lot more lively and able to mimic the actions they wanted. They also took reference from humans to gain specific movements. Overall there was about 14 hours of animation and 2 hours of cinematics - the cinematics was not introduced until the last 5 months of production; this shows that you can be asked to do anything, no matter what time constraints you have.

Matthew spoke about Disneyland adventures and the mammoth task they had to take on. They had less than a year, almost 9 months with 20 animators to produce a game. This game had 36 hours, 28 minutes, 57 seconds and 16 frames of animation with 180 characters, each with its own rig. Near the end of the project they had to outsource to other studios as they did not have enough animators internally. Again for this game they referenced a lot. They watched Disney films and broke them down frame by frame to analyse and figure out how to transfer the movements and the 2D characters into 3D. A lot of work went into both projects, and by outlining what they did it really makes you appreciate all the time and work that goes on to create much loved games.

The last speaker of the day was Carlton Reeve. He pointed out something that took me by surprise, you will find kids these days determined to finish a specific game and put so many hours into it, yet how many hours would they spend studying or trying to improve their education? It takes about 100 hours to complete Grand Theft Auto 4 which is equivalent to 1/2 a GCSE and an 1/18 of a Masters Degree. He wonders what games are really good for - educational games never let you fail, however you do not learn if without failing. If you fail you will normally persevere through until you succeed. Carlton made the point about kids never learn from educational games, however I feel that it really depends what the game involves and what sort of questions are asked. I played many educational games when I was younger and I found them not only enjoyable but I also learnt from them as well. If a game is thought through and produced in a certain way I feel that it may well help someone to improve a certain area in their education.

I found the first day to BAF Game quite interesting as I got to see some of the specific pieces of software used in industry, and got to learn more about what goes on when making a game. Seeing these pieces of software in action and the end results gives me more motivation into wanting to pursue a career in animation and to gain as much knowledge and experience with 3D programmes as I can whilst I am at university.

Tuesday, November 1, 2011

Corporate Cannibal - Moving image analysis


The start of the video makes you wonder what is going on, this thick black line contracting and moving until it starts morphing into what you then realise is Grace Jones. The way that she moves, talks and looks seems quite robotic in a way. Everything merges into one another and is an extension of herself. Because of the post production effects, you cannot see the distinct features of the human body, you are not able to tell her arms from her torso which makes her whole body become one.

The video itself was filmed on a white background and it wasn't until post production where the effects were added in to distort her face, break up and multiple certain features. The distortion of the face by elongating certain facial features ends up emphasising expressions making them feel more tense or angry for example. However I also find that by extending different aspects of Jones and with the whole video being in black and white, it almost adds a creepy feel to it. It is not something I would choose to watch straight away, and definitely not something I would have thought would be used in a music video.

When you look at a music video some of them will have it relating to the lyrics of the song. Corporate Cannibal however doesn't fit into this as it is just Grace Jones on the screen herself, nothing to show how corrupted the corporate industry is. However the video itself, she comes across as very powerful, the effects which have been added change the size of her features and body which you could say it represents the way in which corporations have become huge in our society yet the whole industry can be quite brutal. That the way the corporate industry has become so distorted, only caring about gaining money from people could be shown by the distortion in her face.

The way it ends, shaking her featureless face continuously could possibly show confusion and that no-one is in control or has a say in the corporate world. Particularly at the end Jones growls several times which could emphasise the fact that the corporations are like animals: "...I can't get enough prey, pray for me...eat you like an animal..."

Even though it can come across as quite creepy it sends a powerful message by the way it has been produced. The way a video is produced and what colours and effects are used determine the meaning behind it. If this contained warm colours in relaxed setting, the message would not come across, it would become confused with the video itself. There needs to be a marriage between the lyrics/meaning behind the song and the concept of the video.

To begin with when I first saw this video, my instant reaction was that it was really quite creepy. I didn't particularly like the morphing of her face, to me it didn't make sense. However after analysising this further I have gathered a better understanding of what it might actually mean. I still find it a bit strange, but I can view it with an open mind and not be too judgmental straight off the mark.